Taking care of your skin’s health is just as important as knowing how to wash your makeup brush. Although many people do not have this habit, it is essential.
The frequent use of brushes causes the accumulation of dust and traces of makeup on the bristles, which contributes to the spread of fungi and bacteria. In this way, allergies and skin irritations can arise. The lack of hygiene of makeup brushes, therefore, can cause conjunctivitis, ringworm, dermatitis and herpes. Therefore, cleaning is essential to ensure skin health.
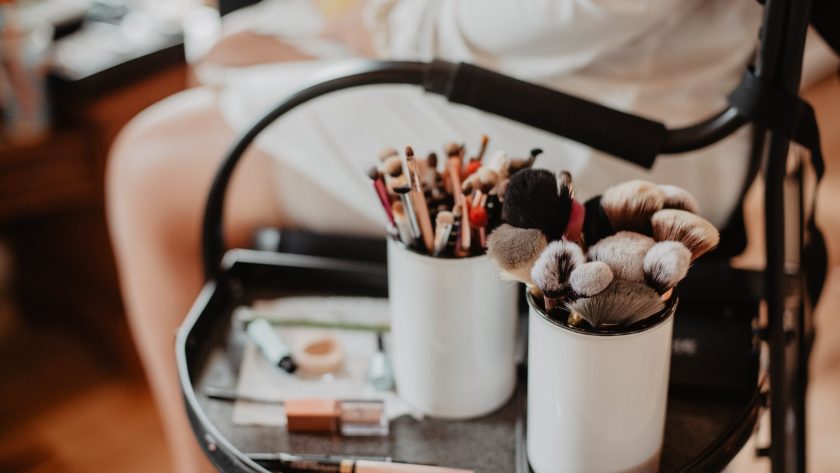
The number 1 rule of how to wash makeup brush is to know if it has natural or synthetic bristles so as not to damage it. After all, each one must be cleaned in a different way. While synthetic bristles can be sanitized with products such as makeup remover, natural bristles should be cleaned more gently, using products such as neutral shampoo.

1. Use shampoo with neutral PH
You might be wondering what to use to wash makeup brushes, and the first option is, believe me, baby shampoo.
Baby shampoos are the most suitable for cleaning makeup brushes. They do not have alcohol in their composition and their PH is balanced, which helps not to damage the bristles.
To clean, the first step should be to moisten the brushes in water and put shampoo in the palm of your hand. Then make circular movements, but very carefully so as not to damage the bristles. Afterward, rinse the brush well under running water.
If the brush is very dirty, repeat the process as many times as necessary. Remove excess water, shape the bristles so that they stay straight and let dry on a paper towel.

2. Clean brushes with makeup remover
If you prefer, the makeup remover is also one of the main tips for washing makeup brushes. Just apply the product to the bristles and let it act for a few minutes. The next step is to wash them under the tap to remove all the product. Take care not to get the brush handles wet. After cleaning, let it dry for at least 24 hours.
Oh! Two-phase makeup removers are great for cleaning foundation and concealer brushes.

3. Wash makeup sponges with bar soap
In addition to knowing how to wash makeup brushes, it is essential to clean makeup sponges. After all, they can bring even greater damage to your skin’s health. But, it takes a little more patience in cleaning. Because you accumulate a lot of product, you have to repeat the process several times.
The first step is to moisten the sponges, this will make cleaning easier. Then rub them in the neutral bar soap. Then just wash it under running water and let it dry. Ah, it is worth mentioning that the soap for washing makeup brushes are also suitable for sponges, including liquids. The only requirement is that they are neutral.
Another way to sanitize sponges is to dip them in a container with water and mild shampoo. Then, just squeeze well to remove the impurities until they are completely clean. In addition, it is important to dispose of sponges periodically, as they have an expiration date.

4. Use sanitizing solution
Another quick and practical tip on how to wash your makeup brushes is to use a sanitizing solution. Just spray the product on the brush until it is very wet and then rub gently with a towel or tissue.
For the dirtiest brushes, the ideal is to spray the sanitizing solution again in order to eliminate all the dirt. Let it dry for approximately 30 minutes and it’s ready to use. Remember that knowing how to dry makeup brushes is just as important as cleaning them. Avoid applying new products before complete drying.
5. Use a silicone sponge
In addition to tips on how to wash makeup brushes with products, there are also some accessories that can help with this function.
There are, for example, several models of silicone sponges that help you clean makeup brushes. To clean, just rub the brush bristles over the surface of the sponge, making back-and-forth movements. Finally, rinse under running water and wait for it to dry.